The following content will show you how to get the most from your Gmail account from logging in to taking advantage of the powerful tools and features offered as part of Gmail. Topics covered will take novice users of online email (and those seeking to improve their ability to use Gmail proficiently) from the basics such as creating and setting up their account to performing advanced organisation of their data using ‘Labels‘ as well as configuring they accounts to block users and create groups of users to aid in making their communication through email as efficient and streamlined as possible.
Summary
- How sign in to login page
- How to change Gmail password
- How to change Gmail username or address
- How to delete a Gmail account
- How to sign out of Gmail
- How to block someone on Gmail
- How to make, create and setup a Gmail account
- How to recall an email in Gmail
- How to forward email to Gmail
- How to create folders in Gmail
- What is archive in Gmail?
- How to add contacts in Gmail
- How to import contact(s) to Gmail
- How to delete contact(s) from Gmail
- How to add another Gmail account
- How to fax from Gmail
- How to delete all emails on Gmail
- How to add or change a signature in Gmail
- How to change default Gmail account
- How to create a group in Gmail
- How to recover deleted emails from Gmail
- How to add Gmail to iPhone
- How to recover Gmail account
- POP, POP3 and SMTP settings
- Useful links to colleges and universities webmail
- Conclusion
How sign in to login page
Logging in is your first step to access your email from any PC and internet browser. It ensures that you can securely access your personal account on Gmail.com. These instructions will show you how to sign in to Gmail.
- Open your web browser and type in the address bar ‘www.gmail.com‘, then hit enter.
- On the top right of the page, look for the ‘Sign in‘ option.
- You will see a text box displaying ‘Enter your email‘. Type your Gmail email address into this box.
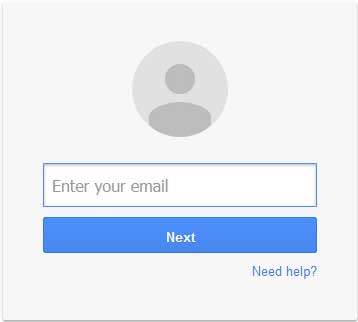
- Click the blue ‘Next‘ button.
- Another text box will be presented, in this box, type your password. Remember to never share your password or allow anyone to see you type it as this risks the integrity of your account!
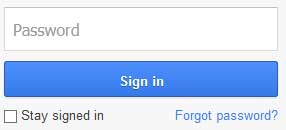
- If you have forgotten or lost your password, click the ‘ Forgot password? ‘ button and follow the instructions shown which will instruct you on changing your password.
- If you are on a public computer, uncheck the ‘Stay signed in‘ button. It is also a good idea to clear your web history before leaving a public computer.
You are now signed into your Gmail account and will see the Gmail window displaying your inbox, with tools along the top and your folders on the left of the window.
How to change Gmail password
From the Gmail window, you can change your password by following these instructions. You may wish to change your password every so often to keep it as secure at possible. If you think that someone else knows your password, it is recommended you change it as soon as possible as anyone with your password can access and change your personal data.
- On the top right of the page, locate the circle icon with your account photo inside of it. Click on this to display the options menu.
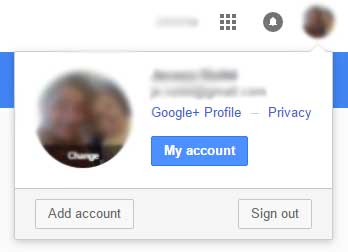
- Click on the blue ‘My Account‘ button.
- Scroll down the page to the ‘Sign-in & security‘ bar and click on it.

- Scroll down the options to see the ‘Password‘ option.
- A security confirmation will appear, retype your Gmail password into the form and click the blue ‘Sign in‘ button.
- You can now type your new Gmail password in the ‘New password‘ field.
- You will see the strength rating of your password on this page, to find out more click on the ‘Why?‘ link.
- To confirm your new password, type it into the lower field.
- To finish, click the blue ‘Change Password‘ button.
- Your Gmail password is now changed.
How to change Gmail username or address
Your Gmail username is how you appear to other email users when they receive a message from you. This is typically kept simple by being set to the users name but can be changed to stay updated with your needs. To change your Gmail username, follow the instructions below. To change your Gmail email address, you will need to register (or complete the registration process) of a new address by clicking here.
Note, that Gmail usernames end in ‘@gmail.com‘, whereas custom domain email addresses can be ‘@anything.com‘. Many business email accounts will use this style of domain name. Other email services use custom domains as suffixes to their users email addresses, you may notice this when you receive mail to your Gmail inbox.
- Log into your Gmail account.
- On the top right of the window, click on the gear button.
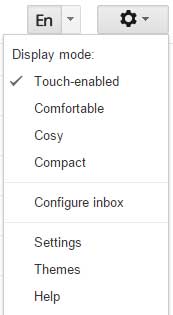
- On the drop down menu, click on ‘Settings‘.
- Along the top of the page in the options tabs, locate and click on the ‘Accounts and Import‘ tab.

- The ‘Send mail as:‘ row will show you the username you currently send mail from.

- Click the ‘Edit info‘ link, and in the yellow pop up window select the empty text box.
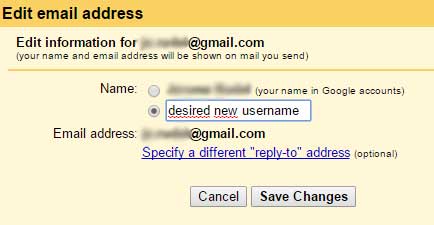
- Type your desired new username in this box.
- Click ‘Save Changes‘. Your username has now been changed.
How to delete a Gmail account
To delete or deactivate your Gmail account, follow the instructions below. Please note, that once deleted, it will not be possible to recover your account, its content and your personal data. You can, however return to Gmail by signing up for a new account.
- Log into your Gmail account.
- From the Gmail window, locate the round icon with your profile picture inside it. Click on this.
- Scroll down the options on the Account Security page to the ‘Account Preferences‘ row.
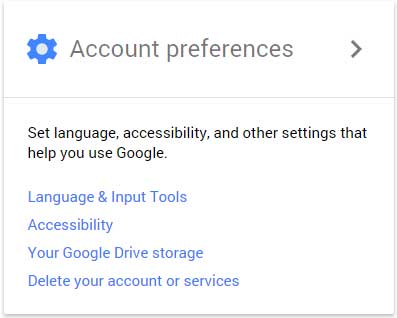
- From here, select the ‘Delete your account or services’ link.
- Choose ‘Delete products‘ from the options list.
- Re-enter your password on the security verification form.
- A list of your Google services will be displayed, to remove Gmail, locate it and click on the trash bin icon to the right.
- Carefully read the instructions, and to continue click the confirmation check box.
- To finish this process, click the red ‘Remove Gmail‘ button at the bottom of the page.
- Your Gmail account has now been removed.
How to sign out of Gmail
It is important that you sign out of Gmail when you are done using its services so that other users cannot access your information unauthorised. It is fast and simple to sign out, and you can do so by following these instructions.
- From the Gmail window, locate the round profile picture on the top right.
- This will display a menu showing a number of options.
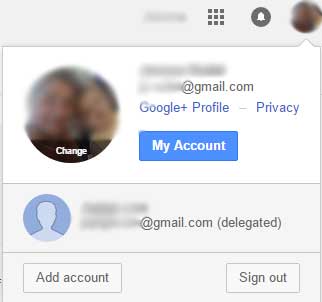
- Choose the ‘Sign out‘ button on the bottom right of the menu.
- Note: Please do not press the back or forward button on your browser during the log out process as this could cause the logout to cancel.
- You are now signed out of Gmail.
How to block someone on Gmail
To block someone from contacting you using your Gmail account, follow the instructions below. This will prevent any mail or notifications reaching you from this person. This is one of many spam settings which Gmail allows you to configure to avoid being pestered by unwanted senders. Blocked senders are added to a blacklist, a list of people who can exclusively not reach you. A whitelist is a list of people who can communicate with you exclusively.
- Log into your Gmail account.
- Find a conversation, Google hangout or chat (from Gmails inbuilt messenger) from the sender you wish to block.
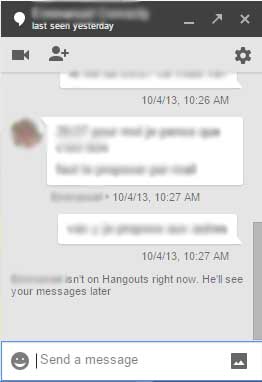
- Open a message from the sender, and on the top right of the box click the button with the down arrow.
- In the drop down menu, select the ‘Block “user‘ option.
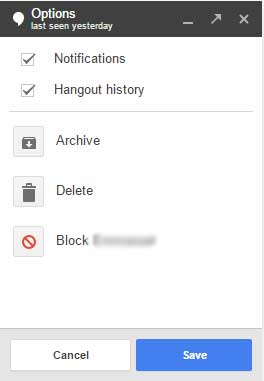
- A confirmation dialogue box will appear, to confirm this is the sender you wish to block click on the blue ‘Block‘ button.
- The sender is now blocked from contacting you through this Gmail account.
How to make, create and setup a Gmail account
Gmail is one of the most popular email services on the web and offers users unlimited storage as well as convenient integration to other Google services such as YouTube, Google Maps and Search. It is easy to setup and get online using Gmail, and by following the steps below you will have set up a Gmail account in minutes.
- Go to ‘www.gmail.com‘.
- Select ‘Create account‘.
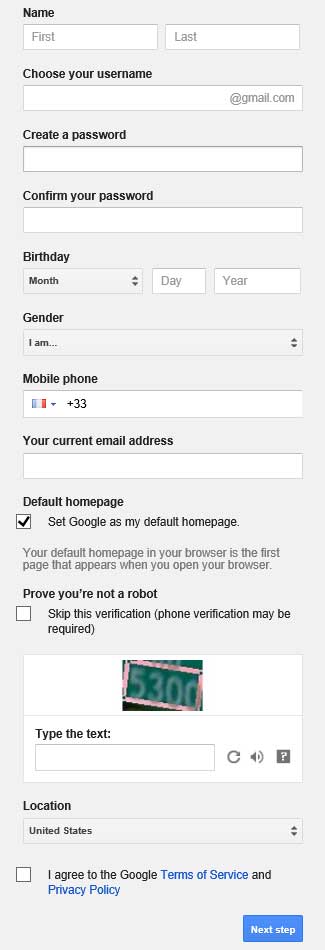
- Complete the form by filling in details such as your name, username, password and date of birth.
- Your gender and mobile phone number will also be required.
- If you have another email address, you can enter it into the form to associate it with your Gmail account.
- Complete the anti-spam verification section.
- Choose your location form the drop down menu.
- Click the blue ‘Next step‘ button.
- Read and accept the Terms & Conditions of the Gmail service by clicking the blue ‘I agree‘ button.
- Click the ‘Continue to Gmail‘ button when you have read the welcome information.
- An on-screen demonstration of Gmail features (such as built-in templates, themes and emoticons) will be displayed, click ‘Next‘ to continue through this stage.
- Your Gmail account is now setup and ready to use, click ‘Go to Gmail‘ to finish.
How to recall an email in Gmail
It is incredibly easy to recall email in Gmail and using its powerful search function. You can find and sort email by following the steps outlined below.
- To find a lookup a particular email in Gmail, log in to your account and use the Search Bar on the top of the Gmail window.
- This will allow you to search by date for an email which includes a name, email address, subject or particular piece of the message content.
- A live email retrieve list will be generated as you type. This can be sorted by sender.
- Press enter to filter your email list to only the relevant results to your search query.
- Select the email you were looking for from the list, where it will be displayed in full.
- Note: Keyboard shortcuts can be used to make searching for email faster.
How to forward email to Gmail
Forwarding email allows you to send email you have received to other email users, creating a copy that you can add a note to. Learn how to forward email by taking the steps below.
- From the Gmail window, select the message you want to forward to open it.
- Within the email you can choose the down arrow button on the top right of the message body.
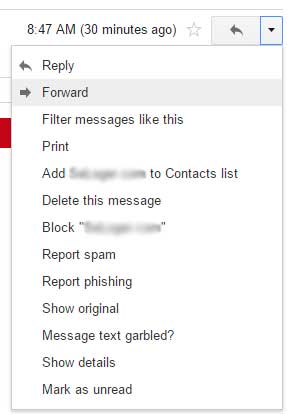
- Choose the ‘Forward‘ option from the drop down list.
- You can enter the Gmail or other email address belonging to other email providers such as Yahoo Mail in the new pop up that appears.
- To forward the email, finish by clicking the blue ‘Send‘ button.
- Your email has now been forwarded to the email address(es) you have specified.
How to create folders in Gmail
Gmail uses smart labels to organise your mail. Labels are an alias which help users organise mail in a custom, personal approach. of This makes the service intuitive and easy to use. As well as the standard automatic labels such as ‘Social‘ and ‘Promotions‘, you can create as many custom labels as you need to organise your email. To do this, follow the instructions below.
- Log into your Gmail account to display your mail.
- Locate and click on the gear icon on the top right, and select the ‘Settings‘ option.
- From the option tabs on the top of the page, choose the ‘Labels‘ link.

- On the bottom of the page, choose the ‘Create new label‘ button.

- Give your new label a name, and choose its location.
- Choose ‘Create‘, and your new label will be created.
- Set up the label in the ‘Labels‘ section of Settings
What is archive in Gmail?
In Gmail, archiving is the tool used to hide messages you are finished with but do not wish to delete completely, making room for you to focus on your new or other non-archived messages. Your archived mail is moved to the ‘All Mail‘ section. The archive function is available in the browser as well as on other devices you are signed into with your Gmail account.
How to add contacts in Gmail
You can add contacts from your previous email provider to Gmail with ease. To add a contact in Gmail, or list of exported records to your new email account follow these instructions.
- Log into your Gmail account to display your mail.
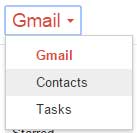
- On the top left of the email screen, click on the red ‘Gmail‘ title.
- From the drop down menu, choose ‘Contacts‘.
- On the bottom right of the page, click the red round button.

- Enter the name of your new contact and click ‘Create‘.
- Complete the form adding as much contact details as you require for the new contact.
- To complete the addition of this new contact, click the blue ‘Save‘ button on the top right of the form.
How to import contact(s) to Gmail
Importing allows you to add a large amount of records to your Gmail account from another provider of application. Simply follow these instructions to learn to do so.
- Log into your Gmail account to display the email area.
- On the top left of the screen, click on the red ‘Gmail‘ title.
- From the drop down menu, choose ‘Contacts‘.
- On the left of this section, choose ‘Import‘ from the options list.
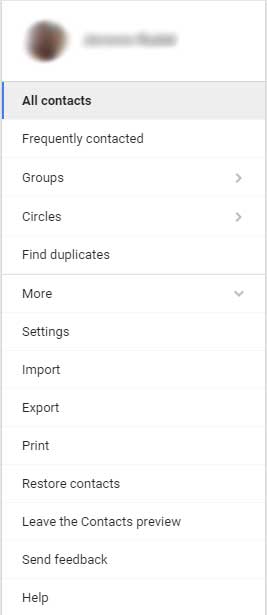
- You can choose the CSV or vCard directory you wish to upload and import to Gmail from the dialogue box. These files are essentially a distribution list, grouping information for each person into a single file making them easy to transfer in one action. They can be exported from your existing or previous contact application.
- Click ‘Import‘ to complete the process.
- Your import is now complete. The dialogue box will close.
How to delete contact(s) from Gmail
You can delete a single person or multiple people from your Gmail account with ease. Follow the instructions below.
- Log into your Gmail account to display the dashboard.
- On the top left of the mail area, click on the red ‘Gmail‘ title.
- From the drop down menu, choose ‘Contacts‘.
- On your list, choose the contact(s) you wish to delete by ticking the checkboxes on the left of each list item.
- Click the ‘More‘ button on the top of the page to display a drop down box.
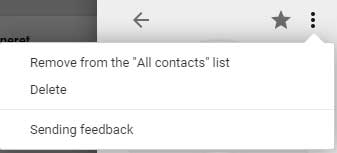
- Choose the ‘Delete Contact(s)‘ option. Your selection is now deleted.
How to add another Gmail account
You can switch between multiple Gmail accounts with simplicity. You may have multiple accounts, one for business, school or personal use. They can all be used collectively with your primary account for maximum ease of use.
- Log into your Gmail account to display the dashboard.
- Click on the round profile picture icon on the top right of the page to display a menu box.

- Choose the ‘Add account‘ button.
- Sign in with your other Gmail or Google Account.
- Your account has now been added. To quickly switch, click on the round profile picture icon on the top right and choose the account you wish to use.
How to fax from Gmail
Gmail can be used to send email as well as fax. This is explained in the instructions below step-by-step.
- Log into your Gmail account to display the mail area.
- Choose ‘Compose‘ to create your message.

- Type the fax number address in the ‘To‘ box.
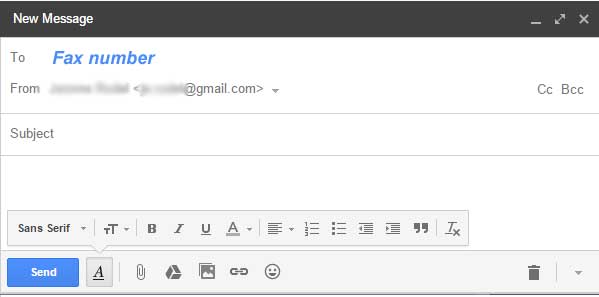
- Type your subject, message and include any attachments such as pictures that are required. Please be aware of the max attachment size limit to prevent a delayed send.
- Choose ‘Send‘ and your fax will be processed and sent.
- Your fax is now sent, and a confirmation message will arrive to verify this. Once confirmed, you can not unsend fax messages. The confirmation message may be slow to appear.
- Messages sent without confirmation may result in recipients not receiving emails.
How to delete all emails on Gmail
- Log into your Gmail account to display the dashboard.
- On the top left of the email list, choose the drop down menu and select the ‘All‘ option.
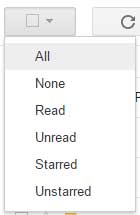
- All of your email messages are now selected.
- To delete these emails, click on the Trash Bin icon – also located on the top of the email home page.

- Your emails are now deleted and have been moved to the Trash section.
- To remove them from Trash, repeat this process in the Trash area by selecting ‘More‘ and ‘Trash‘ from the options list on the left.
How to add or change a signature in Gmail
To add or change your signature in Gmail, follow these instructions.
- Log into your Gmail account to display the mail area.
- Click on the gear icon on the tool bar, and from here click the ‘Settings‘ option.
- From the ‘General‘ tab, scroll down to the ‘Signature‘ row.

- You can add your fully formatted signature in the text box provided. Formatting allows you to use text effects such as strikethrough.
- To save your signature including any changes you have made to your existing signature, click the ‘Save Changes‘ button at the bottom of the page.
- Your signature has now been added and/or modified.
How to change default Gmail account
- Logout of your Gmail and/or Google Accounts.
- Go to www.gmail.com and log in with the account you wish to make your new default account. This will make the account your default Gmail account.
- From the dashboard of this account, you can add more Gmail accounts by going to the top right profile picture icon and choosing the ‘Add account‘ button. This can be done for each account you wish to add alongside your default Gmail account.
How to create a group in Gmail
- Log into your Gmail account to display the mail area.
- On the top left of the mail area, click on the red ‘Gmail‘ title.
- From the drop down menu, choose ‘Contacts‘.
- Select each of the contact(s) you wish to add to the group.
- Enter the name of the group you are creating.
- Once setup, you can configure settings such as read receipts for your group, which will show members when other members have read messages.
- Click ‘OK‘ to complete the creation of your group.
How to recover deleted emails from Gmail
- From the mail screen, go to the left options list, choose ‘More‘.
- Choose ‘Trash‘ from the expanded options list.
- In Trash, search for the email you wish to recover.
- Select these email messages by ticking their check boxes and then drag them to the ‘Inbox‘ folder.
How to add Gmail to iPhone
- On your iPhone, tap the ‘Settings‘ app on the home screen.
- Scroll to the ‘Mail, Contacts, Calendars‘ option and tap.
- Tap the ‘Add Account‘ button.
- Choose ‘Google‘ from the selection area.
- Sign on using your Gmail email address and password.
- Choose which account information you would like to be sync with your iPhone.
- Tap ‘Allow‘. Confirm this on the iOS data list to confirm which sections of your Gmail information such as Calendar, Tasks or Notes you would like to be associated with your iPhone.
- Tap ‘Save‘ to complete the process.
- Your Gmail account is now added to your iPhone.
- Gmail can also be added to Android and other mobile devices.
How to recover Gmail account
If you are unable to login to your Gmail account (for example, if you have had your account hacked by a different user), you can use the recovery options listed below to restore access to your account. Gmail uses two step verification (two factor authentication) and secure encryption to protect your personal data.
- Enter your username on ‘www.gmail.com‘.
- Click ‘Submit‘ to show your options to log in without your password.
- This wil show a CAPTCHA to verify you are a genuine person attempting to access the account.
- Click ‘Submit‘ and choose one of the following options.
- Email – this will send a recovery link to an alternative email account you have added to your Gmail account during its setup.
- Log into this account and follow the instructions on the email to recover your Gmail account.
- Mobile Phone Number – a text with a password reset code will be issued that you can use to reset your password and regain account access to your Gmail account.
- Alternatively – if you cannot use an alternative email address or a designated mobile phone number you can choose ‘I no longer have access to these‘. This will present you with a range of identity verification questions that Google will use to confirm your identity and allow you to recover your account
For more information and emergency methods to recover your account in the event the instructions above are not working, please contact Google Customer Service.
POP, POP3 and SMTP settings
You can use POP, POP3 and SMPTP settings in order to configure your Gmail account with a range of desktop email clients (such as Outlook which requires Exchange settings) and devices.
To locate each of these settings associated with your Gmail account, follow these instructions. These settings may vary if you are using your Gmail account with a business specific app.
- Log into your Gmail account to display your mail.
- Click the gear button on the top right of the page and choose ‘Settings‘.
- Choose the ‘Forwarding and POP/IMAP‘ tab.
- Here, you will see a section for POP, POP3, IMAP and other mail server authentication options for your Gmail account.
- Click the ‘Configuration instructions‘ link below the settings you require, such as push email functionality. The information you require will depend on the version of email client you are using, which is available from the applications help area.
- Follow the instruction and date inputs provided to configure your Gmail account with your email client to allow incoming mail and outgoing mail to be processed. You will need to keep a note of (or download a copy of) the ports and relay information to ensure they match on your client email application as stated on Gmail online. Multiple copies of email found on the server and in your email application will present you with an option to merge or keep the latest content.
- Please Google ‘ is gmail down ‘ to confirm servers are not experiencing issues or an outage if any error messages persist after confirming that information has been entered correctly as the server could be offline temporarily due to a problem.
Useful links to colleges and universities webmail
- odu – www.odu.edu : Old Dominion University
- umaine – mail.maine.edu : University of Maine System Email
- pgcps – gmail.pgcps.org : Prince George’s County Public Schools Google Mail
- rit – google.rit.edu : Rochester Institute of Technology
- adams 12 – www.googleapps.adams12.org : Adams 12 Five Star school district Universal Login page
- vandy (vu) – www.vanderbilt.edu/email/ : Vanderbilt university
- ramapo – gmail.ramapo.edu : Ramapo college of new Jersey
- Worcester state – gmail.worcester.edu : WORCESTER STATE UNIVERSITY EMAIL
- uark – email.uark.edu : University of Arkansas
- uaf (uaa) – webmail.alaska.edu : University of Alaska
- usf – mail.mail.usf.edu : University of South Florida
- udel (ud) – www.udel.edu/mail/ : University of Delaware
- uh manoa (my uh, myuh, hawaii) – gmail.hawaii.edu : University of Hawai’i
- lehigh – www.lehigh.edu/google/ : Lehigh University
- ncsu (nc state) – google.ncsu.edu : NC State University
- usc – google.usc.edu : University of Southern California
- nau – www.nau.edu/its/services/gmail/ : Northern Arizona University
- umn – gmail.umn.edu : University of Minnesota
- uva – www.mail.virginia.edu : University of Virginia
- uc davis (ucdavis) – mail.google.com/a/ucdavis.edu : University of California, Davis One Shields
- porterville college – email.portervillecollege.edu : Porterville College
- Clemson University – g.clemson.edu : Clemson University
- fresno state – googleapps.fresnostate.edu : “California State University, Fresno
- notre dame – gmail.nd.edu : University of Notre Dame
- antioch – mail.antioch.edu : Antioch University
- brandeis – go.brandeis.edu/gmail : Brandeis University
- boomerang – www.boomeranggmail.com : Boomerang for Gmail
- gvsu – mail.gvsu.edu : Grand Valley University
- sjsu – mail.sjsu.edu : San Jose State University
- university of rochester – tech.rochester.edu/services/gmail/ : University of Rochester
- csun – www.csun.edu/it/gmail-students : California State University, Northridge
- ulv (la verne) – myportal.laverne.edu : University of La Verne
- vt – start.google.vt.edu : Virginia Polytechnic Institute and State University
- apu – mail.apu.edu : Azusa Pacific University
- goucher – mail.goucher.edu : Goucher College
- my chemeketa – gmail.my.chemeketa.edu : Chemeketa Community College
- uci – www.google.uci.edu : Office of Information Technology
- matc – mymatc.matc.edu : Milwaukee Area Technical College
- pitzer – pzgmail2.pitzer.edu/LoginFormIdentityProvider : Pitzer College
- jcu – gmail.jcu.edu : John Carroll University
- rowan – mail.students.rowan.edu : Rowan University
- fordham – gmail.fordham.edu : Fordham University
- kean – keansso.kean.edu : Kean University
- uiuc – g.illinois.edu : Illinois University
- yale – its.yale.edu/webmail-portal : Yale University
- uw – gmail.uw.edu : University of Washington
- plu – mail.g.plu.edu : Pacific Lutheran University
- towson – webmail.towson.edu : Towson University
- brown – it.brown.edu/services/type/google-email-gmail : Brown University
- vcu – mymail.vcu.edu : Virginia Commonwealth University
- genentech – gmail.gene.com : Genentech University
Conclusion
We hope that you have found the instructions for everything that you need to know about your Gmail account. For more information and tech support topics please follow this link.
 Login Problems Fix login issues on websites


Well done
Nice post its really helpful for Gmail customer who facing issues related to Gmail account. thanking you for this writing. If you want to know more about Gmail emails can read my blog, Gmail login problems with solutions.
I can get it on my phone but not my laptop.
I have changed my pass word 3 times but still cant get into my gmail